Software/Geant4/Tutorials/Advanced/Computed Tomography: Difference between revisions
SimonJolly (talk | contribs) (Created page with "== <span style="color:#000080"> Introduction </span> == This tutorial is based on the GEANT4 DICOM example originally developed by Louis Archambault, Luc Beaulieu and Vincent Hu...") |
(Formatting changes and tweaks of information contained) |
||
| Line 1: | Line 1: | ||
== | == Introduction == | ||
This tutorial is based on the GEANT4 DICOM example originally developed by Louis Archambault, Luc Beaulieu and Vincent Hubert-Tremblay. In this example a list of DICOM files (.dcm) are converted to ASCII files (.g4dcm) and binary files (.g4bin) that can be read by GEANT4. Each of these files corresponds to a Z Computed tomography (CT) slice. Then, the .g4dcm (.g4bin) files are merged into one volume. | This tutorial is based on the GEANT4 DICOM example originally developed by Louis Archambault, Luc Beaulieu and Vincent Hubert-Tremblay. In this example a list of DICOM files (.dcm) are converted to ASCII files (.g4dcm) and binary files (.g4bin) that can be read by GEANT4. Each of these files corresponds to a Z Computed tomography (CT) slice. Then, the .g4dcm (.g4bin) files are merged into one volume. | ||
The geometry is constructed by voxelizing this volume. There are four navigation algorithms used to create the voxel geometry: | The geometry is constructed by voxelizing this volume. There are four navigation algorithms used to create the voxel geometry: <code>G4RegularNavigation</code>, <code>G4VNestedParameterisation</code>, <code>G4SmartVoxel</code>/<code>G4VoxelNavigation</code> and <code>G4PVReplica</code>. | ||
The material for this volume is constructed by converting the pixel values (Hounsfield numbers) from the DICOM images to densities using the [http://www.hep.ucl.ac.uk/pbt/RadiotherapyWorkbook/skins/common/images/DICOM/CT2Density.dat Hounsfield scale]. Then, the densities are converted to material types according to this [http://www.hep.ucl.ac.uk/pbt/RadiotherapyWorkbook/skins/common/images/DICOM/Materials.txt table]. | The material for this volume is constructed by converting the pixel values (Hounsfield numbers) from the DICOM images to densities using the [http://www.hep.ucl.ac.uk/pbt/RadiotherapyWorkbook/skins/common/images/DICOM/CT2Density.dat Hounsfield scale]. Then, the densities are converted to material types according to this [http://www.hep.ucl.ac.uk/pbt/RadiotherapyWorkbook/skins/common/images/DICOM/Materials.txt table]. | ||
A simple monenergetic electron beam is simulated using | A simple monenergetic electron beam is simulated using <code>G4ParticleGun</code> class. The output of the tutorial is a text file with dose deposition in several voxels. The dose is scored using classes <code>G4MutiFunctionalDetector</code>, <code>G4VPrimitiveScorer</code>, <code>G4PSDoseDeposit3D</code> and <code>G4THitsMap</code>. | ||
http://www.hep.ucl.ac.uk/pbt/RadiotherapyWorkbook/skins/common/images/DICOM/dicom.png | http://www.hep.ucl.ac.uk/pbt/RadiotherapyWorkbook/skins/common/images/DICOM/dicom.png | ||
| Line 13: | Line 13: | ||
This is one of the DICOM files used in the tutorial. | This is one of the DICOM files used in the tutorial. | ||
== | == How to run the tutorial == | ||
=== Create folder DICOMFolder === | |||
<pre | <pre> | ||
ssh -X username@plus1.hep.ucl.ac.uk | ssh -X username@plus1.hep.ucl.ac.uk | ||
| Line 27: | Line 27: | ||
</pre> | </pre> | ||
=== Setup your environment === | |||
<pre | <pre> | ||
[username@plus1 DICOMFolder]$ source /unix/pbt/software/ | [username@plus1 DICOMFolder]$ source /unix/pbt/software/scripts/pbt.sh | ||
</pre> | </pre> | ||
=== Copy the code to your working directory and rename it === | |||
<pre | <pre> | ||
[username@plus1 DICOMFolder]$ cp -r /unix/pbt/tutorials/advanced/DICOM . | [username@plus1 DICOMFolder]$ cp -r /unix/pbt/tutorials/advanced/DICOM . | ||
| Line 41: | Line 41: | ||
</pre> | </pre> | ||
=== Create build directory === | |||
<pre | <pre> | ||
[username@plus1 DICOMFolder]$ mkdir DICOM_build | [username@plus1 DICOMFolder]$ mkdir DICOM_build | ||
</pre> | </pre> | ||
=== Compile the code with <code>make</code> and <code>cmake</code> === | |||
<pre | <pre> | ||
[username@plus1 DICOMFolder]$ cd DICOM_build | [username@plus1 DICOMFolder]$ cd DICOM_build | ||
| Line 57: | Line 57: | ||
</pre> | </pre> | ||
=== Run Macro <code>run.mac</code> === | |||
<pre | <pre> | ||
[username@plus1 DICOM_build]$ ./DICOM run.mac | [username@plus1 DICOM_build]$ ./DICOM run.mac | ||
</pre> | </pre> | ||
== | == Analyze the data == | ||
This is a [http://geant4.web.cern.ch/geant4/UserDocumentation/Doxygen/examples_doc/html/ExampleDICOM.html link] to the official DICOM tutorial explanation notes. We recommend to read it before proceeding with this tutorial. | This is a [http://geant4.web.cern.ch/geant4/UserDocumentation/Doxygen/examples_doc/html/ExampleDICOM.html link] to the official DICOM tutorial explanation notes. We recommend to read it before proceeding with this tutorial. | ||
=== | === Text files === | ||
The macro run.mac produces a text file | The macro <code>run.mac</code> produces a text file <code>dicom.out</code> which includes the dose deposition in several voxels. | ||
=== | === Run with different settings === | ||
Chose among several voxelization algorithms: | |||
* <span style="color:#ff0000"> G4RegularNavigation </span>: | * <span style="color:#ff0000"> G4RegularNavigation </span>: | ||
<code>G4RegularNavigation</code> class is the default class for this tutorial. This algorithm skips frontiers between voxels when they have the same material i.e. "replacing group of voxels with a smaller number of larger voxels". | |||
* <span style="color:#ff0000"> G4NestedParameterization </span>: | * <span style="color:#ff0000"> G4NestedParameterization </span>: | ||
| Line 83: | Line 83: | ||
To run with this voxelization algorithm you need to set the variable '''DICOM_NESTED_PARAM''' | To run with this voxelization algorithm you need to set the variable '''DICOM_NESTED_PARAM''' | ||
<pre | <pre> | ||
[username@plus1 DICOM_build]$ export DICOM_NESTED_PARAM=1 | [username@plus1 DICOM_build]$ export DICOM_NESTED_PARAM=1 | ||
</pre> | </pre> | ||
| Line 89: | Line 89: | ||
You can check if it is set correctly by typing in the command line | You can check if it is set correctly by typing in the command line | ||
<pre | <pre> | ||
[username@plus1 DICOM_build]$ env | [username@plus1 DICOM_build]$ env | ||
</pre> | </pre> | ||
| Line 95: | Line 95: | ||
Then, compile and run the code: | Then, compile and run the code: | ||
<pre | <pre> | ||
[username@plus1 DICOM_build]$ make | [username@plus1 DICOM_build]$ make | ||
| Line 103: | Line 103: | ||
* <span style="color:#ff0000"> G4SmartVoxel / G4VoxelNavigation </span>: | * <span style="color:#ff0000"> G4SmartVoxel / G4VoxelNavigation </span>: | ||
Using smart voxels required a huge amount of memory. At /home/username/DICOMFolder/DICOM_source/src/DicomRegularDetectorConstruction.cc set | Using smart voxels required a huge amount of memory. At <code>/home/username/DICOMFolder/DICOM_source/src/DicomRegularDetectorConstruction.cc</code> set | ||
<pre | <pre> | ||
patient_phys->SetRegularStructureId(0); | patient_phys->SetRegularStructureId(0); | ||
</pre> | </pre> | ||
| Line 111: | Line 111: | ||
compile and run the code: | compile and run the code: | ||
<pre | <pre> | ||
[username@plus1 DICOM_build]$ make | [username@plus1 DICOM_build]$ make | ||
| Line 117: | Line 117: | ||
</pre> | </pre> | ||
=== Change the type, energy and position of the incident particle === | |||
At /home/username/DICOMFolder/DICOM_source/src/DicomPrimaryGeneratorAction.cc change the following lines: | At <code>/home/username/DICOMFolder/DICOM_source/src/DicomPrimaryGeneratorAction.cc</code> change the following lines: | ||
<pre | <pre> | ||
G4ParticleDefinition* particle = particleTable->FindParticle(particleName="e-"); | G4ParticleDefinition* particle = particleTable->FindParticle(particleName="e-"); | ||
| Line 131: | Line 131: | ||
You can chose among several particles like "gamma", "e+", "alpha" and "He3". Then, compile and run the code | You can chose among several particles like "gamma", "e+", "alpha" and "He3". Then, compile and run the code | ||
<pre | <pre> | ||
[username@plus1 DICOM_build]$ make | [username@plus1 DICOM_build]$ make | ||
| Line 137: | Line 137: | ||
</pre> | </pre> | ||
=== | === Visualisation === | ||
Run the visualisation macro vis.mac | Run the visualisation macro <code>vis.mac</code> | ||
<pre | <pre> | ||
[username@plus1 DICOM_build]$ ./DICOM vis.mac | [username@plus1 DICOM_build]$ ./DICOM vis.mac | ||
</pre> | </pre> | ||
which will produce .prim file. You can open this file in DAWN | which will produce <code>.prim</code> file. You can open this file in DAWN | ||
<pre | <pre> | ||
[username@plus1 DICOM_build]$ dawn g4_00.prim | [username@plus1 DICOM_build]$ dawn g4_00.prim | ||
</pre> | </pre> | ||
| Line 154: | Line 154: | ||
http://www.hep.ucl.ac.uk/pbt/RadiotherapyWorkbook/skins/common/images/DICOM/g4_03.eps | http://www.hep.ucl.ac.uk/pbt/RadiotherapyWorkbook/skins/common/images/DICOM/g4_03.eps | ||
Latest revision as of 09:54, 26 September 2017
Introduction
This tutorial is based on the GEANT4 DICOM example originally developed by Louis Archambault, Luc Beaulieu and Vincent Hubert-Tremblay. In this example a list of DICOM files (.dcm) are converted to ASCII files (.g4dcm) and binary files (.g4bin) that can be read by GEANT4. Each of these files corresponds to a Z Computed tomography (CT) slice. Then, the .g4dcm (.g4bin) files are merged into one volume.
The geometry is constructed by voxelizing this volume. There are four navigation algorithms used to create the voxel geometry: G4RegularNavigation, G4VNestedParameterisation, G4SmartVoxel/G4VoxelNavigation and G4PVReplica.
The material for this volume is constructed by converting the pixel values (Hounsfield numbers) from the DICOM images to densities using the Hounsfield scale. Then, the densities are converted to material types according to this table.
A simple monenergetic electron beam is simulated using G4ParticleGun class. The output of the tutorial is a text file with dose deposition in several voxels. The dose is scored using classes G4MutiFunctionalDetector, G4VPrimitiveScorer, G4PSDoseDeposit3D and G4THitsMap.
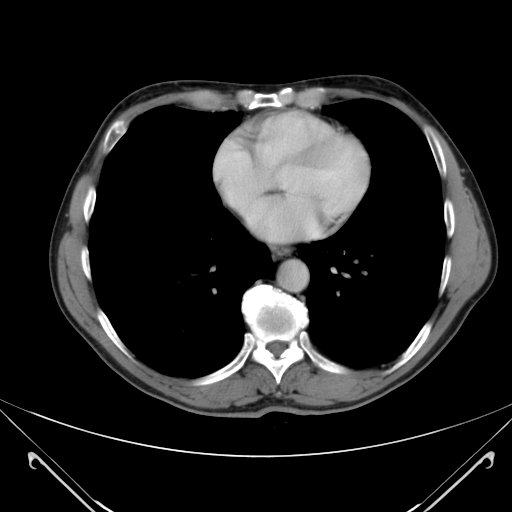
This is one of the DICOM files used in the tutorial.
How to run the tutorial
Create folder DICOMFolder
ssh -X username@plus1.hep.ucl.ac.uk

username@plus1.hep.ucl.ac.uk's password: type your password here

[username@plus1 ~]$ mkdir DICOMFolder

[username@plus1 ~]$ cd DICOMFolder
Setup your environment
[username@plus1 DICOMFolder]$ source /unix/pbt/software/scripts/pbt.sh
Copy the code to your working directory and rename it
[username@plus1 DICOMFolder]$ cp -r /unix/pbt/tutorials/advanced/DICOM .

[username@plus1 DICOMFolder]$ mv DICOM DICOM_source
Create build directory
[username@plus1 DICOMFolder]$ mkdir DICOM_build
Compile the code with make and cmake
[username@plus1 DICOMFolder]$ cd DICOM_build

[username@plus1 DICOM_build]$ cmake -DGeant4_DIR=/unix/pbt/software/dev /home/username/DICOMFolder/DICOM_source

[username@plus1 DICOM_build]$ make
Run Macro run.mac
[username@plus1 DICOM_build]$ ./DICOM run.mac
Analyze the data
This is a link to the official DICOM tutorial explanation notes. We recommend to read it before proceeding with this tutorial.
Text files
The macro run.mac produces a text file dicom.out which includes the dose deposition in several voxels.
Run with different settings
Chose among several voxelization algorithms:
- G4RegularNavigation :
G4RegularNavigation class is the default class for this tutorial. This algorithm skips frontiers between voxels when they have the same material i.e. "replacing group of voxels with a smaller number of larger voxels".
- G4NestedParameterization :
To run with this voxelization algorithm you need to set the variable DICOM_NESTED_PARAM
[username@plus1 DICOM_build]$ export DICOM_NESTED_PARAM=1
You can check if it is set correctly by typing in the command line
[username@plus1 DICOM_build]$ env
Then, compile and run the code:
[username@plus1 DICOM_build]$ make

[username@plus1 DICOM_build]$ ./DICOM run.mac
- G4SmartVoxel / G4VoxelNavigation :
Using smart voxels required a huge amount of memory. At /home/username/DICOMFolder/DICOM_source/src/DicomRegularDetectorConstruction.cc set
patient_phys->SetRegularStructureId(0);
compile and run the code:
[username@plus1 DICOM_build]$ make

[username@plus1 DICOM_build]$ ./DICOM run.mac
Change the type, energy and position of the incident particle
At /home/username/DICOMFolder/DICOM_source/src/DicomPrimaryGeneratorAction.cc change the following lines:
G4ParticleDefinition* particle = particleTable->FindParticle(particleName="e-");

fParticleGun->SetParticleEnergy(100.*MeV);

fParticleGun->SetParticlePosition(G4ThreeVector(0.,0.,0.));
You can chose among several particles like "gamma", "e+", "alpha" and "He3". Then, compile and run the code
[username@plus1 DICOM_build]$ make

[username@plus1 DICOM_build]$ ./DICOM run.mac
Visualisation
Run the visualisation macro vis.mac
[username@plus1 DICOM_build]$ ./DICOM vis.mac
which will produce .prim file. You can open this file in DAWN
[username@plus1 DICOM_build]$ dawn g4_00.prim
This will create 3D image showing the patient geometry and the incident electron beam. The image is big and it takes time to open:
http://www.hep.ucl.ac.uk/pbt/RadiotherapyWorkbook/skins/common/images/DICOM/g4_03.eps